How to Change a Tire (It’s Easier Than You Think)
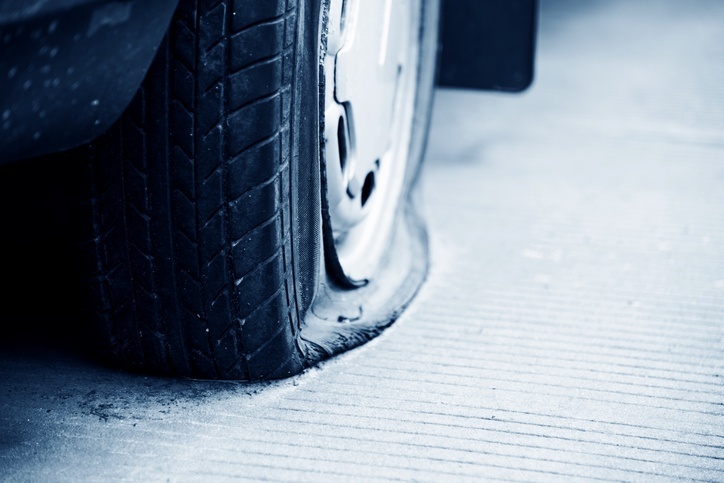
Every driver should know how to change a tire. There may come a day when you become stranded in the middle of nowhere with a flat tire and no working cellphone to call for help. A flat tire can happen anywhere, any time, and to anyone. Fortunately, changing a tire is easy work. Just follow the simple steps listed below, and you’ll know how to change a tire in no time.
The Tools You’ll Need
First off, to fix a flat tire, you need to have the right equipment. These are the items you should have in your car at all times:
- Jack
- Lug wrench
- Fully inflated spare tire
- Vehicle owner’s manual
If you don’t have one or more of these items, go out and purchase them right away. Remember to store them in your vehicle, too. Nobody plans to have a flat tire – it just happens unexpectedly, so it’s best to always be ready.

Those are the essential tools, but to be prepared for the worst, you should also keep some of these items in your trunk:
- Wheel wedges
- Gloves
- Rain coat
- Flashlight with extra batteries
- A small cut of wood to secure the jack
Once you have all the right gear, you’ll be ready to dive into the steps described below.
Step 1: Find a Safe Place to Pull Over
When you notice you have a flat tire, start looking for a safe place to pull over. Don’t abruptly brake or turn. Instead, gradually reduce your speed and pull onto a flat, straight stretch of road out of the way of traffic. It’s important that the surface is level, as it’ll prevent your car from rolling. Stopping on a straight stretch of road is better too, since it makes you more noticeable to oncoming traffic.
Step 2: Prepare Your Vehicle and Get Your Equipment
Once you’ve found a safe place to pull over, you can take out your equipment and prepare your vehicle. First, turn on your hazard lights (otherwise known as “flashers”). Next, to help stop your car from rolling, apply the parking brake.
After that, place wheel wedges against the tires opposite the flat. In other words, place the wedges on the wheels opposite of the end of the car that’s being raised. So, if your front right tire is blown, you’ll place the wedges behind the back two tires. If you don’t have wheel wedges, you can use any large, heavy object, like a brick or a rock.
Finally, you can take out your jack, your lug wrench, your owner’s manual, and your spare tire. It’s time to get to work.
Step 3: Remove the Hubcaps
Most vehicles have hubcaps (or wheel covers), which are discs that cover at least the central portion of the wheel (the hub). Remove the hubcaps to access the lug nuts behind them. To do this, you can use the flat end of your lug wrench.
Some vehicles require different tools to remove their hubcaps. Check your owner’s manual to find out if your car is one of them.
If your lug nuts are already exposed, you can go ahead and jump to Step 4.

Step 4: Loosen the Lug Nuts
The next thing to do is loosen the lug nuts. Use the lug wrench to turn the lug nuts counterclockwise until you break their resistance. Don’t unscrew them all the way; simply unscrew them until they crack.
The reason why you should loosen the lug nuts before raising the vehicle is that by keeping the wheels on the ground, you ensure that you’re turning the nuts and not the wheel.
Don’t be embarrassed if you can’t loosen the lug nuts at first. Sometimes, it can take a bit more brute force to knock them loose. Don’t hesitate to use your body weight or stomp down on the wrench. Just be careful not to strip the lug nuts!
Step 5: Place the Jack Under the Vehicle
After you’ve loosened the lug nuts, you can place the jack under the vehicle. Be sure to place it under the frame near and alongside the tire that you’re going to change. Next, check to make sure that the jack is in contact with the metal portion of your car’s frame. Many vehicles have molded plastic on the bottom with an area of metal expressly made for the jack. If you don’t place the jack on the designated metal area, you’ll damage the plastic as you raise the vehicle.
Always remember to consult your owner’s manual. There, you’ll find out exactly where you’re supposed to place your jack. As well, be sure to place the jack perpendicular to the ground.
Step 6: Raise the Vehicle
Once the jack is in its proper position, raise the vehicle until it’s about six inches off the ground. You can place a small cut of wood in between the jack and your car before raising it. That’ll help prevent your vehicle from slipping on the jack stands.
Never place any part of your body under the vehicle when raising or lowering it with a jack. The last thing you want is to squish a foot or break a leg under the weight of your car. You already have a flat tire, don’t make your day worse with a trip to the hospital.

Step 7: Unscrew the Lug Nuts All the Way
Now that you’ve raised your vehicle, you can unscrew the lug nuts the rest of the way. You’ve already loosened them, so they should come off easily.
You don’t want to lose your lug nuts, so be careful they don’t roll away when you set them down.
Step 8: Remove the Flat Tire
Take a hold of the flat tire by its treads, then gently pull it towards you until it’s free from the hub behind it. Place the flat tire on its side under the vehicle. That way, should the jack fail and the car collapse, the flat tire will (hopefully) keep the car from crushing any limbs. But if the jack is on a flat, solid base, there shouldn’t be any risk of this happening.

Step 9: Mount the Spare Tire on the Hub
Next, you can take your spare tire and place it on the hub. Line up the rim of the spare tire with the lug bolts. After that, push gently until the lug bolts are showing through the rim.
Before you do anything else, make sure you’ve installed the tire the right way and not backwards. It’s easy to tell which is the right way. The valve stem of a tire will always face outwards, away from the vehicle.
Step 10: Use Your Hands to Tighten the Lug Nuts
Your next move will be to put the lug nuts back on the lug bolts and tighten them by hand. Tighten them as much as you can with your hands. Remember to tighten the lug nuts in a star pattern, one at a time. This is to ensure the tire is properly balanced. Double-check afterwards to make sure you didn’t miss any.
If your hands aren’t strong enough to tighten the lug nuts, you can use your lug wrench. However, you must be careful not to exert too much force with the lug wrench. You don’t want to upset the jack.
Don’t tighten the lug nuts all the way. You will tighten them again once the vehicle is lowered.
Step 11: Lower the Vehicle Most of the Way Down, Then Tighten the Lug Nuts
With the jack, lower the vehicle to the point where the spare tire is touching the ground, but is not bearing the full weight of the vehicle. After that, take your lug wrench and tighten the lug nuts as much as possible.

Step 12: Lower the Vehicle All the Way Down, Remove the Jack
Lower the vehicle all the way down, then remove the jack – you don’t need it anymore. After that, take your lug wrench and give your lug nuts one last pull. Remember to follow a star-shaped pattern!
Step 13: Put the Hubcap Back On
If you have a hubcap to put back on, now is the time to do it. Simply put it back on the same way you took it off. If it’s not fitting like it’s supposed to, don’t fuss. Just put the hubcap in your trunk and deal with it later.
Step 14: Put Away Your Gear
Don’t leave anything on the side of the road when you drive away. Take your jack, your lug wrench, and the rest of the tools you used and stow them in your trunk. Oh, and don’t forget about your flat tire. Put that in the trunk with the rest of your equipment.
Step 15: Check Your Spare Tire’s Pressure
Before taking off, take a moment to check your spare tire’s PSI. If there isn’t enough air in the tire, it isn’t safe to drive on. If the tire needs more air, drive slowly to the nearest gas station. There, you should be able to find an air pump you can use for about a loonie.

Step 16: Take Your Flat Tire to a Mechanic
Temporary spare tires are just that – temporary. They weren’t made to go long distances, nor were they made to be driven on at high speeds. Drive carefully (and slowly) until you can visit a mechanic. There, you’ll find out whether your tire can be repaired, or whether it needs to be replaced.
Congratulations, you now know how to change a tire!
Make Go Auto Your Go-To Tire Location
If you need new tires, there’s no better place to get them than Go Auto. With over 10 tire brands to choose from, and up to $400 in free bonus offers when you order and install with us, Go Auto is the best place to get your snow, performance, or economy tires.
To book a service appointment or to order new tires, visit us online by clicking here clicking here.
Stay Connected. Follow Go Auto on Facebook, Twitter, and YouTube!